11

CreateUserWizard Account Activation Email Verification Confirmation

This example code is for CreateUserWizard Account Activation Through Email Verification Confirmation Or Validation In Asp.NET.

I am explaining how to create new signup using createnewuserwizard with membership provider and sending link to activate account using C# or VB.

CreateUserWizard Email Confirmation or verification
Read Create Log in Page Using Login Control to know how to setup membership provider.

I have created one NewUser.aspx page for signups.

One EmailVerification.aspx page to open when user clicks on the link in email sent to his emailid at the time of creating account.

Newly created accounts are deactivated by default and user won't be able to login untill he clicks on the link sent to his email id to validate, verify and activate.


First of all create a template which you want to send to users who sign up on the site. for this create a text file and write the text mentioned below and name it mail.txt.

Hello <%UserName%>!.

You or someone with your id signed up at this site, Your new account is almost ready, but before you can login you need to confirm your email id by visitng the link below:
<%VerificationUrl%>

Once you have visited the verification URL, your account will be activated.

If you have any problems or questions, please reply to this email.

Thanks!

Open NewUser.aspx page in design view and palce a CreateUserWizard control on it.

Set DisableCreatedUser property to true to deactivate new accounts untill user activate it by clicking the link.


Set MailDefinition property as mentioned below for wizard to send cenfirmation emails.

<MailDefinition From="YourGmailID@gmail.com" 
                Subject="Confirmation mail" 
                BodyFileName="~/mail.txt">
</MailDefinition>

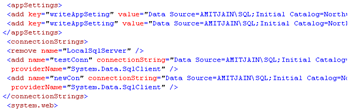
HTML source of NewUser.aspx will look like
<form id="form1" runat="server">
<asp:CreateUserWizard ID="CreateUserWizard1" 
                      runat="server" 
                      DisableCreatedUser="True" 
        ContinueDestinationPageUrl="~/Login.aspx" 
        onsendingmail="CreateUserWizard1_SendingMail">
<MailDefinition From="YourGmailID@gmail.com" 
                Subject="Confirmation mail" 
                BodyFileName="~/mail.txt">
</MailDefinition>
<WizardSteps>
<asp:CreateUserWizardStep runat="server" />
<asp:CompleteWizardStep runat="server" />
</WizardSteps>
</asp:CreateUserWizard>
</form>

Write code mentioned below in SendingMail event of CreateUserWizard control in code behind of page.

C# CODE
using System.Net.Mail;
using System.Web.Security;

protected void CreateUserWizard1_SendingMail(object sender, MailMessageEventArgs e)
    {
        MembershipUser newUserAccount = Membership.GetUser(CreateUserWizard1.UserName);
        Guid newUserAccountId = (Guid)newUserAccount.ProviderUserKey;
        string domainName = Request.Url.GetLeftPart(UriPartial.Authority) + Request.ApplicationPath;
        string confirmationPage = "/EmailConfirmation.aspx?ID=" + newUserAccountId.ToString();
        string url = domainName + confirmationPage;
        e.Message.Body = e.Message.Body.Replace("<%VerificationUrl%>", url);
        SmtpClient smtp = new SmtpClient();
        smtp.Host = "smtp.gmail.com";
        smtp.Port = 587;
        smtp.UseDefaultCredentials = false;
        smtp.Credentials = new System.Net.NetworkCredential("YourGmailUserName@gmail.com", "YourGmailPassword");
        smtp.EnableSsl = true;
        smtp.Send(e.Message);
        e.Cancel = true;
    }

VB.NET CODE
Protected Sub CreateUserWizard1_SendingMail(sender As Object, e As MailMessageEventArgs)
 Dim newUserAccount As MembershipUser = Membership.GetUser(CreateUserWizard1.UserName)
 Dim newUserAccountId As Guid = DirectCast(newUserAccount.ProviderUserKey, Guid)
 Dim domainName As String = Request.Url.GetLeftPart(UriPartial.Authority) + Request.ApplicationPath
 Dim confirmationPage As String = "/EmailConfirmation.aspx?ID=" & newUserAccountId.ToString()
 Dim url As String = domainName & confirmationPage
 e.Message.Body = e.Message.Body.Replace("<%VerificationUrl%>", url)
 Dim smtp As New SmtpClient()
 smtp.Host = "smtp.gmail.com"
 smtp.Port = 587
 smtp.UseDefaultCredentials = False
 smtp.Credentials = New System.Net.NetworkCredential("YourGmailUserName@gmail.com", "YourGmailPassword")
 smtp.EnableSsl = True
 smtp.Send(e.Message)
 e.Cancel = True
End Sub

Mail sent will look like shown below.
Createuserwizard verification email

To activate user through EmailConfirmation.aspx page Place a label control on the page and write below mentioned code in Page_Load Event.

C# CODE
protected void Page_Load(object sender, EventArgs e)
    {
        Guid newUserId = new Guid(Request.QueryString["ID"]);
        MembershipUser newUser = Membership.GetUser(newUserId);
        if (newUser == null)
        {
            lblMessage.Text = "User Account not found";
        }
        else
        {
            newUser.IsApproved = true;
            Membership.UpdateUser(newUser);
            lblMessage.Text = "Account Approved, please  Login to continue";
        }
    }

VB.NET CODE
Protected Sub Page_Load(sender As Object, e As EventArgs)
 Dim newUserId As New Guid(Request.QueryString("ID"))
 Dim newUser As MembershipUser = Membership.GetUser(newUserId)
 If newUser Is Nothing Then
  lblMessage.Text = "User Account not found"
 Else
  newUser.IsApproved = True
  Membership.UpdateUser(newUser)
  lblMessage.Text = "Account Approved, please  Login to continue"
 End If
End Sub


Build and run the application.

Download Sample Code


1

LoginControl Example In Asp.Net To Create Login Page

LoginControl Example In Asp.Net 2.0 3.5 4.0 To Create Login Page Using Membership Provider DataBase ASPNETDB.MDF.

Login Control Example In Asp.Net
Create a new website and add new web form in the solution, name it Login.aspx,


Drag and place a Login control on this page from toolbox in visual studio.

Assign DestinationPageUrl property of Login control to the page we want to open after login, i m redirecting to Default.aspx page.

HTML SOURCE OF LOGIN.ASPX PAGE
<form id="form1" runat="server">
<asp:Login ID="Login1" runat="server" 
           onloginerror="Login1_LoginError"
           RememberMeSet="True"
           DestinationPageUrl="~/Default.aspx">
</asp:Login>
</form>


Place a LoginStatus and LoginName control on Default.aspx page to display username and logout hyperlink.

HTML SOURCE OF DEFAULT.ASPX PAGE
<form id="form1" runat="server">
 <div>
 <asp:LoginStatus ID="LoginStatus1" runat="server" />
 Welcome
 <asp:LoginName ID="LoginName1" runat="server" />
</div>
</form>


Now we need to configure our website or application to use membership provider database to authenticate user login credentials.

For this Click on website menu of visual studio and select ASP.NET Configuration.

Asp.Net membership provider website configuration

Click on Security Tab and click on Use the security Setup Wizard to configure security step by step link.

Security configuration

Click next on welcome screen And Select From the internet option in next screen.

access method

Click next and reach to step 5 to create new user, enter username and password and other informations and click on create user.

create new user

In next screen Select Anonymous User radion button and then select deny permission, click on add this rule to dent anonymous access to site.

deny anonymous access

CLick on finish to complete asp.net membership provider configuration.

This will autometically add ASPNETDB.MDF database in App_Data Folder.

Build and run the application, login with the credentials used in creating new user in configuration.


2

Set Session TimeOut In Asp.Net Using Web.Config IIS

Set Or Manage Session TimeOut In Asp.Net Using Web.Config and IIS

Set Session Timeout in Asp.Net using web.config and IIS

In this post i'm explaining how to set or increase session timeout value in web.config or IIS in Asp.Net.

Read Detecting Session Timeout and Redirect to Login Page in ASP.NET to know how to detect Session TimeOut.

1. Set session timeout in IIS.

Open IIS manager by typing inetmgr in Start > run in windows.

Right click on websites > Select Properties.


Go to ASP.NET tab, Click on Edit Configuration.

Increase Session TimeOut In asp.Net web.config

Click on State Management Tab, Set Session TimeOut value (In Minutes).


2. Set Session TimeOut in Web.Config

We can set session timeout in SessionState section of web.config file as mentioned below, timeout value is in minutes.

<system.web>
    <sessionState mode="InProc" cookieless="false" timeout="15">
    </sessionState>
</system.web>

3. Set session timeout in Global.asax

void Session_Start(object sender, EventArgs e)
{
  // Code that runs when a new session is started
  Session.Timeout = 15;
}


2

Remove Delete Duplicate Rows/Records From DataTable Asp.Net

This post explains how to Remove/Delete Duplicate Rows Records From Datatable using C# or VB.NET in Asp.Net.

Remove Duplicate Rows Records from datatable
My table in database contains duplicate records as shown in image and i want to remove those duplicate records temporaryly efore displaying them in gridview.

For this purpose i'm filling records in DataTable and deleting duplicates.

I have placed one gridview on the page and populating it from DataTable in Page_Load event in code behind.

There are two ways to remove duplicates from datatable.


Method 1:

In this method we create a DataView on DataTable and pass the column names to check for duplicates as array in ToTable method of DataView.

C# CODE
DataView dView = new DataView(dtRemoveDuplicate);
        string[] arrColumns = { "Id", "Name", "Location" };
        dtRemoveDuplicate = dView.ToTable(true, arrColumns);

VB.NET CODE
Dim dView As New DataView(dtRemoveDuplicate)
Dim arrColumns As String() = {"Id", "Name", "Location"}
dtRemoveDuplicate = dView.ToTable(True, arrColumns)

Method 2 :

Create a method which takes datatable and column name to look for duplicates as parameter and returns DataTable after removing duplicate records.

C# CODE
protected DataTable DeleteDuplicateFromDataTable(DataTable dtDuplicate, string columnName)
    {
        Hashtable hashT = new Hashtable();
        ArrayList arrDuplicate = new ArrayList();
        foreach (DataRow row in dtDuplicate.Rows)
        {
            if (hashT.Contains(row[columnName]))
                arrDuplicate.Add(row);
            else
                hashT.Add(row[columnName], string.Empty);
        }
        foreach (DataRow row in arrDuplicate)
            dtDuplicate.Rows.Remove(row);

        return dtDuplicate;
    }

Write this code in Page_Load event of page

C# CODE
protected void Page_Load(object sender, EventArgs e)
    {
        string strConnection = ConfigurationManager.ConnectionStrings["ConString"].ConnectionString;
        SqlConnection con = new SqlConnection();
        con.ConnectionString = strConnection;
        SqlCommand cmd = new SqlCommand();
        cmd.CommandType = CommandType.Text;
        cmd.CommandText = "SELECT * FROM Details";
        cmd.Connection = con;
        SqlDataAdapter dAdapter = new SqlDataAdapter(cmd);
        DataTable dtRemoveDuplicate = new DataTable();
        dAdapter.Fill(dtRemoveDuplicate);
        dtRemoveDuplicate = DeleteDuplicateFromDataTable(dtRemoveDuplicate, "Id");
        GridView1.DataSource = dtRemoveDuplicate;
        GridView1.DataBind();
    }

VB.NET CODE
Protected Sub Page_Load(sender As Object, e As EventArgs)
 Dim strConnection As String = ConfigurationManager.ConnectionStrings("ConString").ConnectionString
 Dim con As New SqlConnection()
 con.ConnectionString = strConnection
 Dim cmd As New SqlCommand()
 cmd.CommandType = CommandType.Text
 cmd.CommandText = "SELECT * FROM Details"
 cmd.Connection = con
 Dim dAdapter As New SqlDataAdapter(cmd)
 Dim dtRemoveDuplicate As New DataTable()
 dAdapter.Fill(dtRemoveDuplicate)
 dtRemoveDuplicate = DeleteDuplicateFromDataTable(dtRemoveDuplicate, "Id")
 GridView1.DataSource = dtRemoveDuplicate
 GridView1.DataBind()
End Sub
Protected Function DeleteDuplicateFromDataTable(dtDuplicate As DataTable, columnName As String) As DataTable
 Dim hashT As New Hashtable()
 Dim arrDuplicate As New ArrayList()
 For Each row As DataRow In dtDuplicate.Rows
  If hashT.Contains(row(columnName)) Then
   arrDuplicate.Add(row)
  Else
   hashT.Add(row(columnName), String.Empty)
  End If
 Next
 For Each row As DataRow In arrDuplicate
  dtDuplicate.Rows.Remove(row)
 Next

 Return dtDuplicate
End Function

Delete Duplicate Records from datatable
And result will be as shown in the image.

All duplicate records have been removed from DataTable.


Download Sample Code


0

DropDownList In DetailsView EditItemTemplate

DropDownList And RadioButtonList In EditItemTemplate Of DetailsView to Edit and Update In Asp.Net.

DropDownList In EditItemTemplate of DetailsView
In This Example i'm going to explain how to put dropdownlist and radiobutton control in EditItemTemplate of DetailsView and Edit or Update Records of DetailsView in asp.net.

For this i have used SqlDataSource To fetch records from database and populate and update detailsview.

We need to write code in DataBound And ItemUpdating Events of Detailsview to get the selected value in dropdownlist from database when edit or update button is pressed.


HTML SOURCE OF ASPX PAGE
<asp:DetailsView ID="DetailsView2" runat="server"
                 AllowPaging="True" DataKeyNames="ID"
                 AutoGenerateRows="False"
                 DataSourceID="SqlDataSource2" Height="50px"
                 Width="125px"
                 onDataBound="DetailsView2_DataBound"
                 onItemUpdating="DetailsView2_ItemUpdating">
<Fields>
<asp:TemplateField HeaderText="ID">
<ItemTemplate>
<asp:Label ID="lblID" runat="server" Text='<%#Eval("ID") %>'>
</asp:Label>
</ItemTemplate>
</asp:TemplateField>
<asp:BoundField DataField="Name" HeaderText="Name" SortExpression="Name" />
<asp:TemplateField HeaderText="Gender">
<ItemTemplate>
<asp:Label ID="lblGender" runat="server" Text='<%#Eval("Sex") %>'>
</asp:Label>
</ItemTemplate>
<EditItemTemplate>
<asp:RadioButtonList ID="rbGender" runat="server">
<asp:ListItem>Male</asp:ListItem>
<asp:ListItem>Female</asp:ListItem>
</asp:RadioButtonList>
</EditItemTemplate>
</asp:TemplateField>
<asp:TemplateField HeaderText="Status">
<ItemTemplate>
<asp:Label ID="lblStatus" runat="server" Text='<%#Eval("Status") %>'>
</asp:Label>
</ItemTemplate>
<EditItemTemplate>
<asp:DropDownList ID="ddlStatus" runat="server">
<asp:ListItem>Single</asp:ListItem>
<asp:ListItem>Married</asp:ListItem>
</asp:DropDownList>
</EditItemTemplate>
</asp:TemplateField>
<asp:CommandField ShowEditButton="True" />
</Fields>
</asp:DetailsView>
</div>
<asp:SqlDataSource ID="SqlDataSource2" runat="server"
ConnectionString="<%$ ConnectionStrings:ConnectionString %>"
SelectCommand="SELECT [ID], [Name], [Sex], [Status] FROM [Details]"
UpdateCommand="UPDATE Details SET Name = @Name, Sex = @Sex,
MaritalStatus = @Stauts WHERE (ID = @ID)">
<UpdateParameters>
<asp:Parameter Name="Name" />
<asp:Parameter Name="Sex" />
<asp:Parameter Name="Stauts" />
<asp:Parameter Name="ID" />
</UpdateParameters>
</asp:SqlDataSource>

Now to pouplate value from database in selected index of dropdown and then set the new selected value in sqldatasource parameter write below mentioned code in DataBound and ItemUpdating Event of DetailsView respectively.

C# CODE
protected void DetailsView2_DataBound(object sender, EventArgs e)
    {
        if (((DetailsView)sender).CurrentMode == DetailsViewMode.Edit)
        {
                DataRowView row = (DataRowView)((DetailsView)sender).DataItem;
                RadioButtonList rblGender = (RadioButtonList)((DetailsView)sender).FindControl("rbGender");
                DropDownList ddlStatus = (DropDownList)((DetailsView)sender).FindControl("ddlStatus");
                rblGender.SelectedValue = row[2].ToString();
                ddlStatus.SelectedValue = row[3].ToString();
        }
    }
    protected void DetailsView2_ItemUpdating(object sender, DetailsViewUpdateEventArgs e)
    {
        RadioButtonList rblGender = (RadioButtonList)((DetailsView)sender).FindControl("rbGender");
        DropDownList ddlStatus = (DropDownList)((DetailsView)sender).FindControl("ddlStatus");
        SqlDataSource2.UpdateParameters["Sex"].DefaultValue = rblGender.SelectedValue;
        SqlDataSource2.UpdateParameters["Stauts"].DefaultValue = ddlStatus.SelectedValue;
    }

VB.NET CODE
Protected Sub DetailsView2_DataBound(sender As Object, e As EventArgs)
 If DirectCast(sender, DetailsView).CurrentMode = DetailsViewMode.Edit Then
  Dim row As DataRowView = DirectCast(DirectCast(sender, DetailsView).DataItem, DataRowView)
  Dim rblGender As RadioButtonList = DirectCast(DirectCast(sender, DetailsView).FindControl("rbGender"), RadioButtonList)
  Dim ddlStatus As DropDownList = DirectCast(DirectCast(sender, DetailsView).FindControl("ddlStatus"), DropDownList)
  rblGender.SelectedValue = row(2).ToString()
  ddlStatus.SelectedValue = row(3).ToString()
 End If
End Sub
Protected Sub DetailsView2_ItemUpdating(sender As Object, e As DetailsViewUpdateEventArgs)
 Dim rblGender As RadioButtonList = DirectCast(DirectCast(sender, DetailsView).FindControl("rbGender"), RadioButtonList)
 Dim ddlStatus As DropDownList = DirectCast(DirectCast(sender, DetailsView).FindControl("ddlStatus"), DropDownList)
 SqlDataSource2.UpdateParameters("Sex").DefaultValue = rblGender.SelectedValue
 SqlDataSource2.UpdateParameters("Stauts").DefaultValue = ddlStatus.SelectedValue
End Sub

Build and run the application.

Download Sample Code


0

A Potentially Dangerous Request.Form Value Was Detected From Client

A potentially dangerous Request.Form value was detected from the client.

This "A potentially dangerous Request.Form value was detected from the client" error occurs when user enter any script tag <> like or any html <> tag like etc in textbox.

Potentially dengerous requestForm error

Reason for this is asp.net prevent any attempt to compromise the security of application by script injection like cross site scriptiong etc through textbox.

To resolve this issue we can do following things.


1. Set validateRequest property to false in page directive.

<%@ Page Language="C#" AutoEventWireup="true"  CodeFile="Default.aspx.cs"
Inherits="_Default" ValidateRequest="false" %>

2.You can set ValidateRequest property to false in web.config if you want to turn validateRequest off for the whole application
<configuration>
  <configuration>
    <system.web>
      <pages validateRequest="false" />
    </system.web>
</configuration>

3. If you don't want to set validateRequest to false then use methods like regular expression or replace() to check for any special character or script tag entry in text box

<asp:textbox id="TextBox2" runat="server"
             onblur="this.value = this.value.replace(/&lt;\/?[^>]+>/gi, '');">
</asp:textbox>

hope this helps.


1

Write Modify Web.Config Programmatically At Run Time

Write Modify Web.Config ConnectionString And AppSettings Programmatically At Run Time In Asp.Net

In this post I'm going to explain how to write or modify CnnectionStrings and AppSettings programmatically at run time in Web.Config file in Asp.Net.

Write web.config programmatically
To write or modify web.config programmatically we need to use ebConfigurationManager Class in System.Web.Configuration namespace.


We can add write or modify any section of web.config programmatically, here i m describing how to modify and write connectionStrings and AppSettings section of Web.Config file.

For this first of all add this namespace in code behind of page.

using System.Web.Configuration;

I have put two textbox on the page to display on Page Load and write new or modify existing connectionString in web.config file on Button Click Event.

HTML SOURCE OF PAGE
<form id="form1" runat="server">
<div>
<asp:TextBox ID="txtKey" runat="server">
</asp:TextBox>
<asp:TextBox ID="txtConnectionString" runat="server">
</asp:TextBox>
<asp:Button ID="btnWrite" runat="server" 
            onclick="btnWrite_Click" 
            Text="Modify/Write" />
</div>
</form>

Write below mentioned code in code behind of page to show existing connectionString in web.config on page Load.

C# CODE
protected void Page_Load(object sender, EventArgs e)
    {
        if (!IsPostBack)
        {
          txtConnectionString.Text = ConfigurationManager.ConnectionStrings[0].ConnectionString;
            
        }
    }

VB.NET CODE
Protected Sub Page_Load(sender As Object, e As EventArgs)
 If Not IsPostBack Then

  txtConnectionString.Text = ConfigurationManager.ConnectionStrings(0).ConnectionString
 End If
End Sub

To modify name of existing connection string in web.config programmatically write below mentioned code in Click Event of Button.

C# CODE
protected void btnWrite_Click(object sender, EventArgs e)
    {
        Configuration connectionConfiguration = WebConfigurationManager.OpenWebConfiguration("~");
        connectionConfiguration.ConnectionStrings.ConnectionStrings["test"].Name = txtKey.Text;
        connectionConfiguration.Save(ConfigurationSaveMode.Modified);
        ConfigurationManager.RefreshSection("connectionStrings");
    }

To modify value of existing connection string in web.config programmatically write below mentioned code in Click Event of Button.

C# CODE
protected void btnWrite_Click(object sender, EventArgs e)
    {
        Configuration connectionConfiguration = WebConfigurationManager.OpenWebConfiguration("~");
        connectionConfiguration.ConnectionStrings.ConnectionStrings["test"].ConnectionString = txtConnectionString.Text;
connectionConfiguration.Save(ConfigurationSaveMode.Modified);
ConfigurationManager.RefreshSection("connectionStrings");

VB.NET CODE
Protected Sub btnWrite_Click(sender As Object, e As EventArgs)
 Dim connectionConfiguration As Configuration = WebConfigurationManager.OpenWebConfiguration("~")
 connectionConfiguration.ConnectionStrings.ConnectionStrings("test").Name = txtKey.Text
 connectionConfiguration.ConnectionStrings.ConnectionStrings("test").ConnectionString = txtConnectionString.Text
 connectionConfiguration.Save(ConfigurationSaveMode.Modified)
 ConfigurationManager.RefreshSection("connectionStrings")
End Sub

To add or write new name and value of connection string in web.config at run time write below mentioned code

C# CODE
protected void btnWrite_Click(object sender, EventArgs e)
    {
        Configuration connectionConfiguration = WebConfigurationManager.OpenWebConfiguration("~");
        
        ConnectionStringSettings csAddNewConString = new ConnectionStringSettings(txtKey.Text,txtConnectionString.Text ,"System.Data.SqlClient");
        
 ConnectionStringsSection csNewConSection = connectionConfiguration.ConnectionStrings;
        
 csNewConSection.ConnectionStrings.Add(csAddNewConString);
        
        connectionConfiguration.Save(ConfigurationSaveMode.Modified);

        ConfigurationManager.RefreshSection("connectionStrings");
    }

VB.NET CODE
Protected Sub btnWrite_Click(sender As Object, e As EventArgs)
 Dim connectionConfiguration As Configuration = WebConfigurationManager.OpenWebConfiguration("~")

 Dim csAddNewConString As New ConnectionStringSettings(txtKey.Text, txtConnectionString.Text, "System.Data.SqlClient")

 Dim csNewConSection As ConnectionStringsSection = connectionConfiguration.ConnectionStrings

 csNewConSection.ConnectionStrings.Add(csAddNewConString)

 connectionConfiguration.Save(ConfigurationSaveMode.Modified)

 ConfigurationManager.RefreshSection("connectionStrings")
End Sub


To write or add new key and value of connectionstring in AppSettings Section of web.config we can write code as mentioned below.

C# CODE
protected void btnWrite_Click(object sender, EventArgs e)
    {
        Configuration connectionConfiguration = WebConfigurationManager.OpenWebConfiguration("~");
        
        connectionConfiguration.AppSettings.Settings.Add("writeAppSettingsString", txtConnectionString.Text);
        
        connectionConfiguration.Save(ConfigurationSaveMode.Modified);
        
        ConfigurationManager.RefreshSection("connectionStrings");
    }

VB.NET CODE
Protected Sub btnWrite_Click(sender As Object, e As EventArgs)
 Dim connectionConfiguration As Configuration = WebConfigurationManager.OpenWebConfiguration("~")

 connectionConfiguration.AppSettings.Settings.Add("writeAppSettingsString", txtConnectionString.Text)

 connectionConfiguration.Save(ConfigurationSaveMode.Modified)

 ConfigurationManager.RefreshSection("connectionStrings")
End Sub

To remove any existing connection string in AppSettings we can use Remove() method

connectionConfiguration.AppSettings.Settings.Remove("writeAppSettingsString");

Hope this helps.


5

GridView XML Edit Delete Insert Update

GridView XML Edit Delete Insert Update. In this example i'm explaining how to Edit Delete Insert and update XML file data in GridView using C# and VB.Net in Asp.Net.

GridView Xml Edit Delete Insert Update Asp.Net
I have created a XML file with three fields Firstname,LastName and Location.

XML file looks like mentioned below.


Amit Jain Mumbai
User 3 Noida
User 4 Bangalore

I have placed one gridview on aspx page and three textbox in editItemTemplate of gridview for editing, one button and three textbox in Footer Template for Inserting new records in XML file.

HTML SOURCE OF PAGE
<asp:GridView ID="GridView1" runat="server" 
              AutoGenerateColumns="False" ShowFooter="True" 
              onrowcancelingedit="GridView1_RowCancelingEdit" 
              onrowdeleting="GridView1_RowDeleting" 
              onrowediting="GridView1_RowEditing" 
              onrowupdating="GridView1_RowUpdating" 
              onrowcommand="GridView1_RowCommand">
<Columns>
<asp:CommandField ShowEditButton="true" />
<asp:CommandField ShowDeleteButton="true" />
 
<asp:TemplateField HeaderText="First Name">
<ItemTemplate>
<asp:Label ID="lblFname" runat="server" Text='<%#Eval("FirstName") %>'/>
</ItemTemplate>
<EditItemTemplate>
<asp:TextBox ID="txtFirstName" runat="server" Text='<%#Bind("FirstName")%>'/>
</EditItemTemplate>
<FooterTemplate>
<asp:Button ID="btn" runat="server" Text="Insert" CommandName="InsertXMLData"/>
<asp:TextBox ID="txtFirstNameInsert" runat="server"/>
</FooterTemplate>
</asp:TemplateField>
 
<asp:TemplateField HeaderText="Last Name">
<ItemTemplate>
<asp:Label ID="lblLname" runat="server" Text='<%#Eval("LastName") %>'/>
</ItemTemplate>
<EditItemTemplate>
<asp:TextBox ID="txtLastName" runat="server" Text='<%#Bind("LastName") %>'/>
</EditItemTemplate>
<FooterTemplate>
<asp:TextBox ID="txtLastNameInsert" runat="server"/>
</FooterTemplate>
</asp:TemplateField>
 
<asp:TemplateField HeaderText="Location">
<ItemTemplate>
<asp:Label ID="lblLocation" runat="server" Text='<%#Eval("Location") %>'/>
</ItemTemplate>
<EditItemTemplate>
<asp:TextBox ID="txtLocation" runat="server" Text='<%#Bind("Location") %>'/>
</EditItemTemplate>
<FooterTemplate>
<asp:TextBox ID="txtLocationInsert" runat="server"/>
</FooterTemplate>
</asp:TemplateField>
</Columns>
</asp:GridView>


c# CODE
protected void Page_Load(object sender, EventArgs e)
    {
        if (!Page.IsPostBack)
            BindGridView();
    }
    protected void BindGridView()
    {
        DataSet dsXML = new DataSet();
        dsXML.ReadXml(Server.MapPath("~/App_Data/XMLFile.xml"));
        GridView1.DataSource = dsXML;
        GridView1.DataBind();
        GridView1.ShowFooter = true;
    }

    protected void GridView1_RowDeleting(object sender, GridViewDeleteEventArgs e)
    {
        BindGridView();
        DataSet dsGrid = (DataSet)GridView1.DataSource;
        dsGrid.Tables[0].Rows[GridView1.Rows[e.RowIndex].DataItemIndex].Delete();
        dsGrid.WriteXml(Server.MapPath("~/App_Data/XMLFile.xml"));
        BindGridView();

    }
    protected void GridView1_RowEditing(object sender, GridViewEditEventArgs e)
    {
        GridView1.ShowFooter = false;
        GridView1.EditIndex = e.NewEditIndex;
        BindGridView();
    }
    protected void GridView1_RowUpdating(object sender, GridViewUpdateEventArgs e)
    {
        int index = GridView1.Rows[e.RowIndex].DataItemIndex;
        string firstName = ((TextBox)GridView1.Rows[e.RowIndex].FindControl("txtFirstName")).Text;
        string lastName = ((TextBox)GridView1.Rows[e.RowIndex].FindControl("txtLastName")).Text;
        string location = ((TextBox)GridView1.Rows[e.RowIndex].FindControl("txtLocation")).Text;
        GridView1.EditIndex = -1;
        BindGridView();
        DataSet dsUpdate = (DataSet)GridView1.DataSource;
        dsUpdate.Tables[0].Rows[index]["FirstName"] = firstName;
        dsUpdate.Tables[0].Rows[index]["LastName"] = lastName;
        dsUpdate.Tables[0].Rows[index]["Location"] = location;
        dsUpdate.WriteXml(Server.MapPath("~/App_Data/XMLFile.xml"));
        BindGridView();
        
    }
    protected void GridView1_RowCancelingEdit(object sender, GridViewCancelEditEventArgs e)
    {
        GridView1.EditIndex = -1;
        BindGridView();
    }

    protected void GridView1_RowCommand(object sender, GridViewCommandEventArgs e)
    {
        
        if(e.CommandName == "InsertXMLData")
        {
        string firstname = ((TextBox)GridView1.FooterRow.FindControl("txtFirstNameInsert")).Text;
        string lastname = ((TextBox)GridView1.FooterRow.FindControl("txtLastNameInsert")).Text;
        string location = ((TextBox)GridView1.FooterRow.FindControl("txtLocationInsert")).Text;
        BindGridView();
        DataSet dsInsert = (DataSet)GridView1.DataSource;
        DataRow drInsert = dsInsert.Tables[0].NewRow();
        drInsert["FirstName"] = firstname;
        drInsert["LastName"] = lastname;
        drInsert["Location"] = location;
        dsInsert.Tables[0].Rows.Add(drInsert);
        dsInsert.WriteXml(Server.MapPath("~/App_Data/XMLFile.xml"));
        BindGridView();
        }
    }

VB.NET
Protected Sub Page_Load(sender As Object, e As EventArgs)
 If Not Page.IsPostBack Then
  BindGridView()
 End If
End Sub
Protected Sub BindGridView()
 Dim dsXML As New DataSet()
 dsXML.ReadXml(Server.MapPath("~/App_Data/XMLFile.xml"))
 GridView1.DataSource = dsXML
 GridView1.DataBind()
 GridView1.ShowFooter = True
End Sub

Protected Sub GridView1_RowDeleting(sender As Object, e As GridViewDeleteEventArgs)
 BindGridView()
 Dim dsGrid As DataSet = DirectCast(GridView1.DataSource, DataSet)
 dsGrid.Tables(0).Rows(GridView1.Rows(e.RowIndex).DataItemIndex).Delete()
 dsGrid.WriteXml(Server.MapPath("~/App_Data/XMLFile.xml"))
 BindGridView()

End Sub
Protected Sub GridView1_RowEditing(sender As Object, e As GridViewEditEventArgs)
 GridView1.ShowFooter = False
 GridView1.EditIndex = e.NewEditIndex
 BindGridView()
End Sub
Protected Sub GridView1_RowUpdating(sender As Object, e As GridViewUpdateEventArgs)
 Dim index As Integer = GridView1.Rows(e.RowIndex).DataItemIndex
 Dim firstName As String = DirectCast(GridView1.Rows(e.RowIndex).FindControl("txtFirstName"), TextBox).Text
 Dim lastName As String = DirectCast(GridView1.Rows(e.RowIndex).FindControl("txtLastName"), TextBox).Text
 Dim location As String = DirectCast(GridView1.Rows(e.RowIndex).FindControl("txtLocation"), TextBox).Text
 GridView1.EditIndex = -1
 BindGridView()
 Dim dsUpdate As DataSet = DirectCast(GridView1.DataSource, DataSet)
 dsUpdate.Tables(0).Rows(index)("FirstName") = firstName
 dsUpdate.Tables(0).Rows(index)("LastName") = lastName
 dsUpdate.Tables(0).Rows(index)("Location") = location
 dsUpdate.WriteXml(Server.MapPath("~/App_Data/XMLFile.xml"))
 BindGridView()

End Sub
Protected Sub GridView1_RowCancelingEdit(sender As Object, e As GridViewCancelEditEventArgs)
 GridView1.EditIndex = -1
 BindGridView()
End Sub

Protected Sub GridView1_RowCommand(sender As Object, e As GridViewCommandEventArgs)

 If e.CommandName = "InsertXMLData" Then
  Dim firstname As String = DirectCast(GridView1.FooterRow.FindControl("txtFirstNameInsert"), TextBox).Text
  Dim lastname As String = DirectCast(GridView1.FooterRow.FindControl("txtLastNameInsert"), TextBox).Text
  Dim location As String = DirectCast(GridView1.FooterRow.FindControl("txtLocationInsert"), TextBox).Text
  BindGridView()
  Dim dsInsert As DataSet = DirectCast(GridView1.DataSource, DataSet)
  Dim drInsert As DataRow = dsInsert.Tables(0).NewRow()
  drInsert("FirstName") = firstname
  drInsert("LastName") = lastname
  drInsert("Location") = location
  dsInsert.Tables(0).Rows.Add(drInsert)
  dsInsert.WriteXml(Server.MapPath("~/App_Data/XMLFile.xml"))
  BindGridView()
 End If
End Sub

Build and run the application.

Download Sample Code


Find More Articles