In this example i am explaining how to create Nested GridView Inside Gridview To Show Master Detail Or Parent Child Data In Asp.Net Using C# VB.NET.
 For this i have used northwind database and customers and Orders table to display data.
Drag SqlDataSource1 on page and configure it to fetch data Customers table and select CustomerID and CustomerName fields in select statement.
Drag and drop sqlDataSource2 on the page and configure it to fetch data from Orders table based on customer id in where clause.
Place one gridview on the page and set SqlDataSource1 as it's datasource.
Create one TemplateField field in this gridview and put another gridview inside ItemTemplate and provide SqlDataSOurce2 as it's datasource, set it's visible property to False.
Complete HTML source of page will look like shown below.
Now generate SelectedIndexChanged event for parent gridview (GridView1) and write code mentioned below.
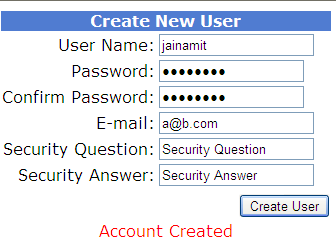
Build and run the application.
Drag SqlDataSource1 on page and configure it to fetch data Customers table and select CustomerID and CustomerName fields in select statement.
Drag and drop sqlDataSource2 on the page and configure it to fetch data from Orders table based on customer id in where clause.
Place one gridview on the page and set SqlDataSource1 as it's datasource.
Create one TemplateField field in this gridview and put another gridview inside ItemTemplate and provide SqlDataSOurce2 as it's datasource, set it's visible property to False.
Complete HTML source of page will look like shown below.
HTML SOURCE OF THE PAGE
<form id="form1" runat="server">
<div>
<asp:GridView ID="GridView1" runat="server"
              AllowPaging="True"
              AutoGenerateColumns="False"
              DataKeyNames="CustomerID"
              DataSourceID="SqlDataSource1"
onselectedindexchanged="GridView1_SelectedIndexChanged">
<RowStyle VerticalAlign="Top" />
<Columns>
<asp:BoundField DataField="CustomerID"
                HeaderText="CustomerID"
                ReadOnly="True"
                SortExpression="CustomerID" />

<asp:BoundField DataField="CompanyName"
                HeaderText="CompanyName"
                SortExpression="CompanyName" />

<asp:CommandField ShowSelectButton="True"
                  SelectText="Show Details"/>

<asp:TemplateField>
<ItemTemplate>
<asp:GridView ID="GridView2" runat="server"
              AutoGenerateColumns="False"
              DataKeyNames="OrderID"
              DataSourceID="SqlDataSource2"
              Visible="false">
<Columns>
<asp:BoundField DataField="OrderID"
                HeaderText="OrderID"
                InsertVisible="False"
                ReadOnly="True"
                SortExpression="OrderID" />
<asp:BoundField DataField="OrderDate"
                HeaderText="OrderDate"
                SortExpression="OrderDate" />
</Columns>
</asp:GridView>
</ItemTemplate>
</asp:TemplateField>
</Columns>
</asp:GridView>

<asp:SqlDataSource ID="SqlDataSource1"
                   runat="server"
ConnectionString="<%$ ConnectionStrings:NorthwindConnectionString %>"
SelectCommand="SELECT [CustomerID], [CompanyName]
               FROM [Customers]">
</asp:SqlDataSource>

<asp:SqlDataSource ID="SqlDataSource2"
                   runat="server"
ConnectionString="<%$ ConnectionStrings:NorthwindConnectionString %>"
SelectCommand="SELECT [OrderID], [OrderDate]
               FROM [Orders]
               WHERE ([CustomerID] = @CustomerID)">
<SelectParameters>
<asp:Parameter Name="CustomerID" Type="String"/>
</SelectParameters>
</asp:SqlDataSource>
</div>
</form>
Now generate SelectedIndexChanged event for parent gridview (GridView1) and write code mentioned below.
C# CODE BEHIND
protected void GridView1_SelectedIndexChanged(object sender, EventArgs e)
    {
        foreach (GridViewRow gvRow in GridView1.Rows)
        {
            gvRow.FindControl("GridView2").Visible = false;
        }
        SqlDataSource2.SelectParameters[0].DefaultValue = GridView1.SelectedDataKey[0].ToString();
        GridView1.SelectedRow.FindControl("GridView2").Visible = true;
    }
VB.NET CODE BEHIND
Protected Sub GridView1_SelectedIndexChanged(sender As Object, e As EventArgs)
 For Each gvRow As GridViewRow In GridView1.Rows
  gvRow.FindControl("GridView2").Visible = False
 Next
 SqlDataSource2.SelectParameters(0).DefaultValue = GridView1.SelectedDataKey(0).ToString()
 GridView1.SelectedRow.FindControl("GridView2").Visible = True
End Sub
Build and run the application.